
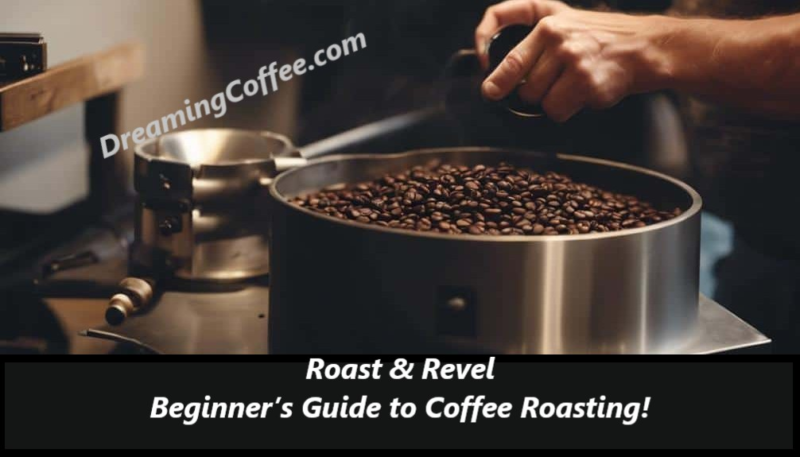
Roast & Revel: Beginner’s Guide to Coffee Roasting.
Why Roast Your Own Coffee?

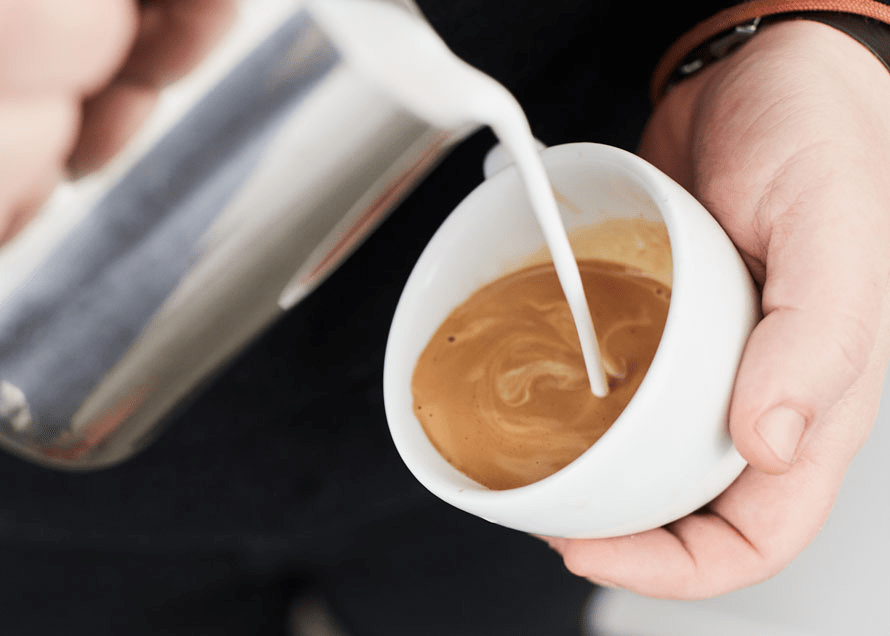
Roasting coffee at home transforms your daily brew into more than a caffeine fix it’s a sensory journey. The crackling of beans, the changing aromas, and the moment you taste your custom roast are all part of the experience. By learning to roast, you:
- Control the roast level to match your taste
- Unlock flavors that pre-roasted beans often lose in storage
- Connect with coffee’s origins in a hands on way
If you’ve ever wanted to customize your coffee and elevate your brewing ritual, roasting is the next step.
Coffee Varieties Explained.
Arabica (Coffea Arabica)
- Known for delicate flavors, floral notes, and pleasant acidity
- Often described as fruity, chocolatey, or wine-like
- Lower caffeine compared to Robusta
- Most specialty coffee shops prioritize Arabica
Robusta (Coffea Canephora)
- Strong, bold, and bitter with a heavier body
- Contains almost double the caffeine of Arabica
- Popular in espresso blends for crema and punch
- Hardy plant that thrives in hotter climates
Specialty Coffees
- Beans grown under ideal conditions in specific regions (e.g., Ethiopia, Colombia, Panama)
- Carefully processed to highlight unique terroir flavors
- Often graded above 80 points on the Specialty Coffee Association scale
💡 Advice: Start your roasting journey with high-quality Arabica beans — they’re forgiving and produce nuanced flavors that beginners can easily detect.
Choosing the Best Coffee Roaster for Beginners.
1. Air Roasters
- Use hot air to evenly roast beans
- Easy to operate, great for beginners
- Produce clean and bright flavor profiles
- Downside: Smaller batch sizes
2. Drum Roasters
- Beans rotate in a heated drum (like professional roasters)
- Provide excellent control and depth of flavor
- More hands-on and better for those who want to experiment
- Higher cost and learning curve
3. Popcorn Popper (DIY Option)
- Budget-friendly way to try roasting at home
- Needs modifications (thermometer, stirring method)
- Can handle small test batches
- Great for experimenting before investing in a real roaster
💡 Advice: If you’re just starting, an air roaster or modified popcorn popper is ideal. Once you fall in love with roasting, upgrading to a drum roaster makes sense.
Step-by-Step: The Coffee Roasting Process.

1. Green Beans.
Purchase fresh, green coffee beans from reputable sources. They last longer than roasted beans and give you the freedom to roast on demand.
2. Preheating.
Warm your roaster to between 350°F (175°C) and 500°F (260°C) depending on your target roast (light, medium, or dark).
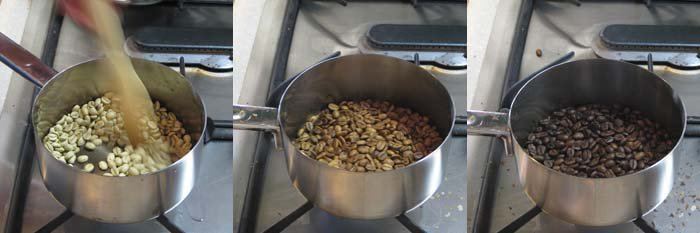
3. Roasting Stages
- Drying Phase (beans turn yellow, grassy smell fades)
- First Crack (popping sound, light roast level begins)
- Development (flavors deepen, caramel notes form)
- Second Crack (darker roast, oils appear on bean surface)
The key is to listen, smell, and watch — your senses are the best roasting tools.
4. Cooling.
Immediately cool beans to stop roasting. Use:
- A colander and fan
- A dedicated cooling tray
- Or stir in a metal bowl
5. Resting & Storage.
Let beans rest 12–24 hours for carbon dioxide to release and flavors to stabilize. Store them in:
- Airtight containers
- Cool, dark places
- Away from light and moisture
💡 Advice: Roast small batches weekly instead of big batches monthly. Freshness is everything in coffee flavor.
Roast Levels & Flavour Notes.
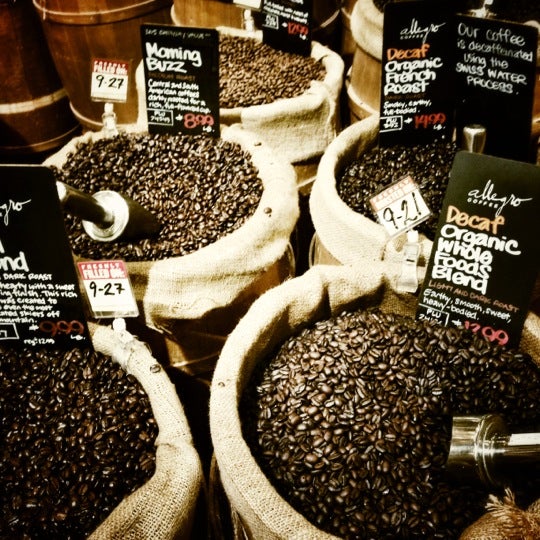
- Light Roast: Bright acidity, fruity, floral. Best for pour-over.
- Medium Roast: Balanced acidity and body. Great for drip coffee.
- Dark Roast: Bold, smoky, chocolaty. Perfect for espresso.
💡 Tip: Start with medium roast until you develop a taste preference, then experiment lighter or darker.
Perfect 👍 Adding a Roasting Troubleshooting Section will make the guide much more practical and beginner-friendly. I’ll expand it with the most common issues, their causes, and fixes.
Coffee Roasting Troubleshooting Guide.
Even with the best beans and equipment, beginners (and even pros) run into roasting problems. The good news is that most issues have simple fixes once you learn to spot them.

1. Beans Roast Too Fast.
Symptoms: Beans turn dark quickly, harsh flavours, burnt taste.
Causes:
- Roaster temperature set too high
- Small batch size overheats easily
- Poor airflow
Fixes:
- Lower the starting temperature by 20–30°F (10–15°C)
- Roast slightly larger batches for stability
- If using an air roaster, adjust airflow to balance heat
💡 Tip: Aim for a 10–15 minute roast time — fast enough to keep flavors vibrant, but slow enough to avoid scorching.
2. Beans Roast Too Slowly.
Symptoms: Pale beans, grassy taste, flat aroma.
Causes:
- Not enough heat
- Overloaded roaster
- Weak airflow in air roasters
Fixes:
- Increase charge temperature (starting heat)
- Roast smaller batches
- Ensure your roaster fan is clear of dust/chaff
💡 Tip: If a roast drags beyond 20 minutes, flavors usually flatten. Keep roasts within 9–18 minutes.

3. Uneven Roast (Light & Dark Beans Mixed).
Symptoms: Some beans are pale, others burnt.
Causes:
- Uneven heat distribution
- Drum not rotating consistently
- Inconsistent bean density (mixing different varieties)
Fixes:
- Stir or agitate beans more often (popcorn popper users: shake it!)
- Use a roaster with good airflow and drum rotation
- Roast beans of similar size and density together
💡 Tip: Stick with single-origin beans at first — blends can complicate roasting.
4. Scorched or Tipped Beans.
Symptoms: Burn marks on bean edges (“tipping”) or flat sides (“scorching”).
Causes:
- Beans hit very hot surfaces in the roaster
- Too much heat applied early
- Drum roasters with poor agitation
Fixes:
- Lower initial heat slightly
- Allow beans to heat gradually during drying phase
- Improve bean movement (stirring, shaking, better drum rotation)
5. Baking (Dull, Lifeless Flavour)
Symptoms: Flat, cardboard-like taste; no aroma.
Causes:
- Roasting curve too slow and steady (beans “baked” instead of roasted)
- Not enough temperature momentum into first crack
Fixes:
- Apply more heat early in the roast, then taper down
- Avoid holding beans in yellowing phase too long
- Track roast time — aim for steady progression, not stalling
6. Missing or Weak First Crack.
Symptoms: No audible popping; beans underdeveloped.
Causes:
- Too low heat, roast stalled
- Old or poor-quality beans
- Overloaded roaster
Fixes:
- Roast smaller batches
- Raise heat slightly earlier in roast
- Always start with fresh green beans
💡 Tip: If you can’t hear first crack, use smell (caramel/toasty aroma) and visual cues (beans expanding, turning brown).
7. Beans Too Oily (Even at Medium Roast).
Symptoms: Shiny, oily surface soon after roasting; stale taste.
Causes:
- Roast went too deep into second crack
- Beans stored too warm or exposed to air
- Old green beans
Fixes:
- Stop roasting just before second crack for medium-dark
- Store roasted beans in airtight containers
- Source fresher green beans
💡 Tip: A little oil is normal for dark roasts, but oil + staleness = over-roasted or poorly stored beans.
✅ Quick Troubleshooting Table.
| Problem | Likely Cause | Fix |
|---|---|---|
| Beans roast too fast | Heat too high | Lower charge temp, larger batch |
| Beans roast too slow | Not enough heat | Raise temp, reduce batch size |
| Uneven roast | Poor bean movement | Stir more, roast single-origin |
| Scorching/tipping | Beans touching hot surfaces | Lower initial heat, better agitation |
| Baked flavor | Roast curve stalled | Apply more heat early, avoid dragging |
| No first crack | Too little heat or old beans | Fresh beans, increase heat slightly |
| Oily beans | Over-roasted or poor storage | Stop earlier, store properly |

Coffee Travel Guide: Best Cafés and Roasters Around the World.
For coffee lovers, exploring the world often means discovering unique cafés and specialty roasters. From local hidden gems to famous…

Sustainable Coffee: How to Drink Responsibly.
Sustainable Coffee: How to Drink Responsibly. Introduction Sustainable coffee isn’t just a trend it’s a movement that supports farmers, protects the environment,…

Coffee Storage Tips: Keeping Beans Fresh and Flavourful.
Coffee Storage Tips: Keeping Beans Fresh and Flavourful. Introduction Fresh coffee starts with proper storage. Even high-quality beans lose flavour and aroma…

Specialty Coffee Drinks: Lattes, Cortados, and More Explained.
Coffee culture isn’t just about black coffee it’s also about specialty drinks that combine espresso, milk, foam, and ………………. Read…

Coffee and Sleep: How to Enjoy Your Brew Without Insomnia.
Coffee can be a lifesaver in the morning, but drinking it at the wrong time can disrupt sleep and impact…

Healthy Coffee Habits: Enjoy Your Brew Without the Guilt.
Healthy Coffee Habits: Enjoy Your Brew Without the Guilt Introduction Coffee can be one of life’s greatest pleasures, but many people worry…
Conclusion.
Roasting coffee at home is both art and science. By experimenting with different beans, roast levels, and methods, you’ll discover flavours no café can replicate. Whether you start with a simple popcorn popper or invest in a drum roaster, each roast teaches you something new.
So, grab a bag of green beans, fire up your roaster, and begin your coffee roasting adventure today.
Author.

Brendon McAliece, (Aka Gunnie) is a military veteran with 23 years working on Jet Fighters, their weapons systems and ejection seat/module systems as well as munitions and R&D. Involved with flight simulation since the 1980s he has flown all the major flight simulators over the years.
Coffee has been part of his life sine he was young and loves the different flavours and aromas coffee offers. He is an Australian expat who has lived in Malaysia, UK, Saudi Arabia and more recently Thailand. He is a multi-lingual blogger who loves to share his life experiences here on DreamingCoffee.com, www.LetsFlyVFR.com and www.DreamingGuitar.com, his lifestyle and Travel experiences Blog.
Learn more @
DreamingGuitar.com – DreamingCoffee.com – LetsFlyVFR.com
Home – Blog – Shop – About
As an amazon.com affiliate I may earn on qualifying sales.